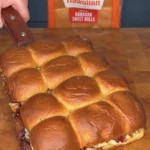


Smoked Dr Pepper BBQ beef sliders are chuck roast cubes smoked at 275°F for 2 to 3 hours until bark forms, then braised in a foil pan with Dr Pepper, BBQ sauce, brown sugar, and butter at 325°F for 1.5 to 2 hours until the meat reaches 200°F to 205°F and shreds easily. You layer the shredded beef on slider rolls with jalapeño cream cheese spread, pepper jack cheese, and crispy fried onions. Bake the assembled sliders at 375°F for 20 to 23 minutes until the cheese melts and tops turn golden.
The Dr Pepper braise creates sweet, tangy flavor while breaking down the chuck roast’s collagen into gelatin. This makes the meat incredibly tender and juicy. The carbonation in Dr Pepper helps tenderize faster than liquid without carbonation. The brown sugar and butter add richness. The BBQ sauce provides smoky depth. The jalapeño cream cheese spread balances the richness with creamy heat. Caramelized onions add sweetness. Fresh jalapeños provide bite.
These BBQ beef sliders take about 5 hours total from seasoning to serving. The smoking phase develops bark and smoke flavor. The covered braising phase creates tender, shreddable meat. The final baking melts cheese and toasts the rolls. The result is game day food that feeds 12 to 15 people with impressive flavor and minimal hands-on work. Perfect for parties, tailgates, and family gatherings.
Why Chuck Roast Is the Best Cut for Shredded Beef Sliders
Chuck roast creates the best shredded beef sliders because it contains the ideal fat-to-meat ratio for staying juicy during extended cooking. Chuck comes from the shoulder area of the cow. This heavily worked muscle develops lots of connective tissue and marbling. When you smoke and braise chuck, the connective tissue breaks down into gelatin. This creates incredibly tender, moist meat that shreds easily.
The fat content in chuck (about 20% to 25%) prevents drying during the 4.5-hour cook time. Leaner cuts like eye of round or sirloin would dry out before becoming tender enough to shred. The fat renders slowly during smoking and braising. It bastes the meat from the inside. Some fat melts into the braising liquid, creating rich sauce.
Chuck roast also has excellent beefy flavor that stands up to strong seasonings. The muscle fibers are coarse and flavorful. This robust taste complements BBQ rub, smoke, and sweet Dr Pepper sauce without getting lost. Milder cuts taste bland after long cooking with bold flavors.
The price point makes chuck practical for feeding crowds. Chuck typically costs $5 to $8 per pound. More tender cuts like brisket flat can run $12 to $15 per pound. For sliders feeding 12 to 15 people, you’ll spend $20 to $30 on chuck versus $50+ on premium cuts. The results are equally delicious.
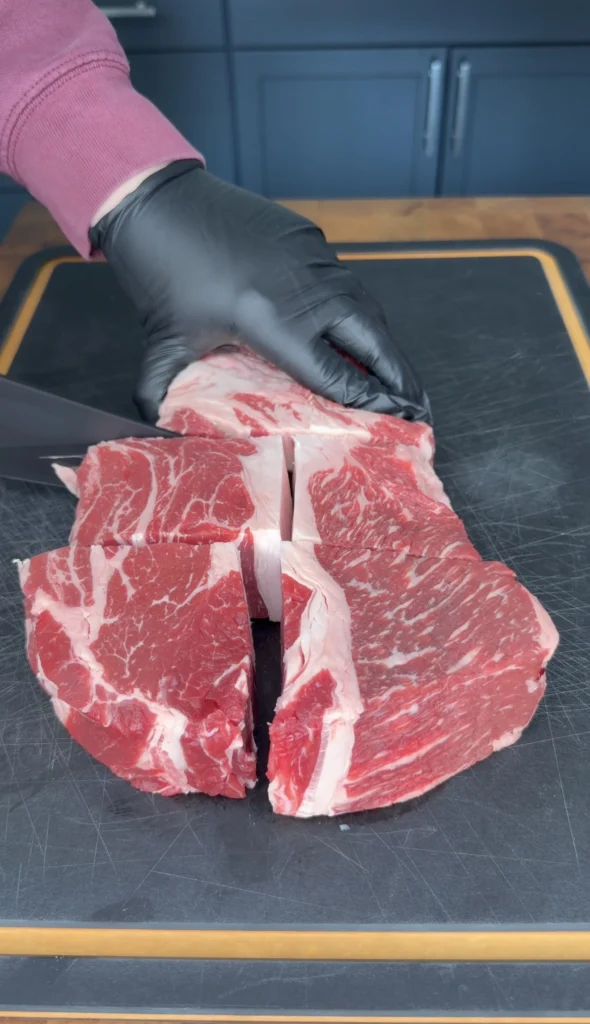
Cutting chuck into cubes before cooking offers advantages over smoking a whole roast. Cubes have more surface area for smoke penetration. Every piece develops bark on all sides. A whole roast only gets bark on the exterior. The interior tastes less smoky. Cubes also cook 2 to 3 hours faster than whole roasts of the same weight.
The 2 to 3-inch cube size is optimal. Smaller cubes (1 inch) dry out during smoking before the braising phase. Larger cubes (4+ inches) take too long to cook through. The 2 to 3-inch size cooks evenly, develops good bark, and stays juicy.
How Dr Pepper Enhances BBQ Braising Better Than Water or Broth

Dr Pepper creates superior braising liquid for Dr Pepper BBQ beef because its unique blend of 23 flavors adds complexity that water or broth can’t match. The soda contains cherry, vanilla, caramel, and spice notes. These flavors complement BBQ sauce naturally. As the liquid reduces during braising, these flavors concentrate and penetrate the meat.
The carbonation in Dr Pepper helps tenderize meat faster than flat liquids. The carbonic acid is mildly acidic. This acid breaks down tough muscle fibers and connective tissue. The tiny bubbles also help the liquid penetrate deeper into the meat. This creates more even flavor distribution. Flat water or broth can’t achieve the same penetration.
The sugar content in Dr Pepper (about 40 grams per 12-ounce can) caramelizes during braising. This creates deep, complex sweetness different from just adding sugar. The caramelized soda sugars combine with brown sugar in the recipe. Together they create thick, glossy sauce. The beef gets coated in this sticky glaze when you shred it.
Dr Pepper’s acidity balances the richness of butter and beef fat. Without acid, the braising liquid tastes heavy and one-dimensional. The soda brightens all the flavors. It prevents the sauce from tasting greasy or overwhelming. This acid balance makes the sliders more craveable.
Regular cola works as a substitute but tastes different. Coca-Cola has stronger vanilla and less complexity. Pepsi is sweeter with less spice. Dr Pepper’s unique flavor profile is specifically designed for this application. Many competition BBQ teams use Dr Pepper in their beef and pork recipes for good reason.
The amount of Dr Pepper (10 ounces from a 12-ounce can) is precisely calibrated. Too much liquid dilutes the BBQ sauce and brown sugar. The meat steams rather than braises. Too little liquid causes burning and doesn’t create enough sauce for coating. The 10-ounce amount combines with rendered beef fat and butter to create perfect braising environment.
Why the Two-Stage Cooking Method Produces Better Results

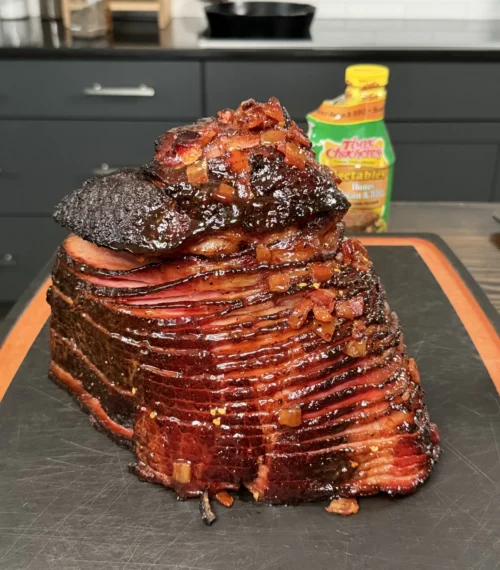
The two-stage smoking and braising method creates better smoked chuck roast sliders than single-stage cooking because each phase serves different purposes. Smoking at 275°F develops bark and smoke flavor. Braising at 325°F breaks down collagen for tenderness. You can’t achieve both goals at one temperature.
Smoking the cubed chuck at 275°F for 2 to 3 hours allows gradual smoke penetration without overcooking the exterior. At this temperature, smoke compounds stick to the tacky meat surface. The rub sets into a crust. Fat begins rendering slowly. The meat develops that essential BBQ bark. If you started with the braising phase, the wet environment would prevent bark formation.
The smoking phase also brings internal temperature to about 160°F. This is the “stall” temperature where evaporative cooling slows cooking. For whole roasts, the stall can last hours. With cubed meat, you power through it quickly. By the time you start braising, the meat is already well into the cooking process.
Increasing temperature to 325°F for the covered braise accelerates collagen breakdown. Collagen converts to gelatin between 160°F and 205°F. Higher heat speeds this conversion. The covered foil pan traps steam. This moist heat environment is perfect for breaking down tough connective tissue. Dry smoking at 275°F would take 8+ hours to achieve the same tenderness.
![]()
The braising liquid creates flavorful sauce while tenderizing the meat. As the chuck cubes cook in Dr Pepper, BBQ sauce, brown sugar, and butter, they absorb these flavors. The rendered beef fat combines with the braising ingredients. By the time the meat reaches 200°F to 205°F, you have perfectly seasoned, fall-apart tender beef swimming in rich sauce.
Single-stage cooking can’t replicate these results. If you smoked at 275°F for 6 hours without braising, the beef would be tender but dry. The exterior would be over-smoked and bitter. If you only braised at 325°F without smoking, you’d have tender beef with no smoke flavor or bark. The two-stage method gives you the best of both techniques.
Dr Pepper BBQ Beef Sliders
Smoked Chuck Roast with Jalapeño Cream Cheese & Pepper Jack
Ingredients
For the Smoked BBQ Beef
For the Jalapeño Cream Cheese Spread
For the Sliders
Cutting the chuck roast into cubes before smoking reduces cook time by 2 to 3 hours compared to smoking a whole roast. The increased surface area allows more smoke penetration and faster rendering of fat. Each cube develops bark on all sides rather than just the exterior of a whole roast. This creates more flavorful, evenly smoked meat that shreds perfectly after braising.
Step-by-Step Instructions
Step 1: Season and Rest the Chuck Roast
Cut 3 to 4 pounds chuck roast into 2 to 3-inch cubes. Trim away any large exterior fat caps but leave internal marbling. Pat the cubes dry with paper towels. Moisture prevents rub from adhering properly.
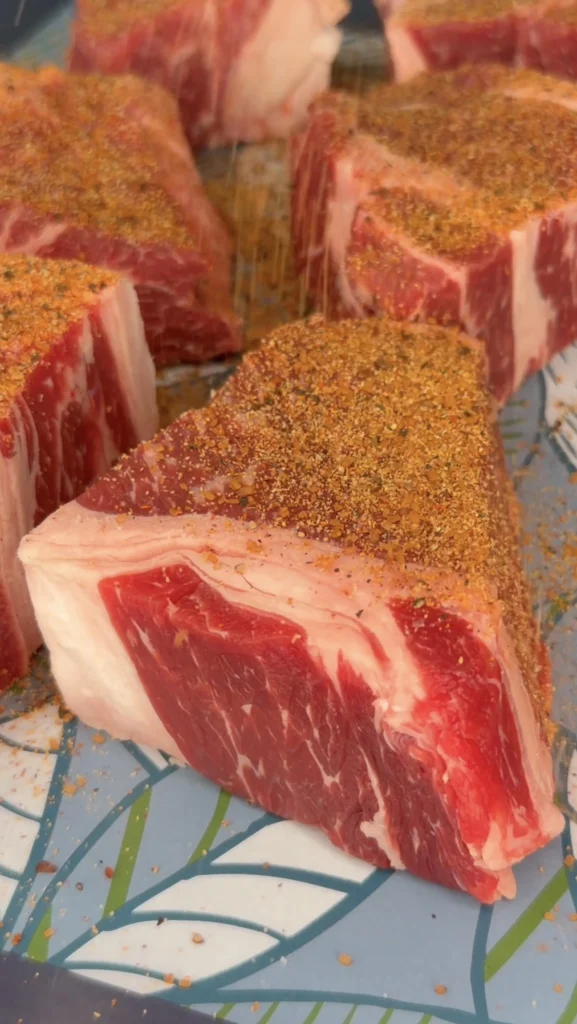
Coat the beef cubes evenly with 2 tablespoons BBQ rub. Use a rub with salt, pepper, paprika, and garlic as the base. Toss the cubes in a large bowl to ensure all sides get seasoned. You can also season them on a baking sheet, turning each piece.
Let the seasoned beef rest at room temperature for 30 minutes. This allows the rub to adhere and start drawing moisture to the surface. The surface becomes tacky. This helps smoke compounds stick better during smoking. The meat also loses its refrigerator chill. Room temperature meat cooks more evenly.
Step 2: Smoke the Beef Cubes
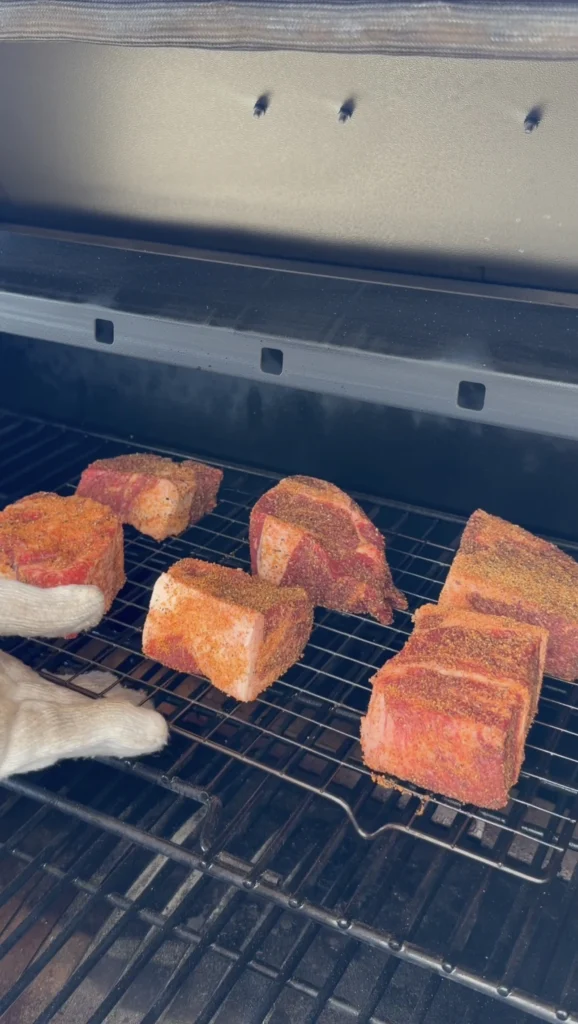
Preheat your pellet smoker, offset smoker, or charcoal grill to 275°F. Use hickory, oak, or pecan wood for best smoke flavor. Hickory provides classic BBQ smoke. Oak is neutral and lets beef shine. Pecan adds nutty sweetness.
Place the seasoned chuck roast cubes directly on the smoker grates. Space them with small gaps between pieces. Don’t crowd them. Air needs to circulate around each cube for even cooking and smoke penetration.
Close the lid and smoke for 2 to 3 hours without opening unnecessarily. You’re looking for bark to form on all sides. The exterior should look dark and crusty. Insert an instant-read thermometer into the center of a thick cube. It should read about 160°F.
The beef won’t be tender yet. That’s expected. You’re building smoke flavor and bark during this phase. The cubes should have reduced in size slightly from fat rendering. They should smell intensely smoky.
Step 3: Braise in Dr Pepper BBQ Bath
![]()
Transfer the smoked beef cubes to a large disposable aluminum foil pan. A 9×13-inch pan works well. Arrange the cubes in a single layer if possible. Slight overlap is fine.
Pour 10 ounces Dr Pepper over the beef. Add 6 ounces BBQ sauce, ⅓ cup brown sugar, and 1 stick (½ cup) butter cut into slices. The butter slices should be scattered across the top. As they melt, they’ll distribute throughout the pan.
Cover the pan tightly with heavy-duty aluminum foil. Crimp the edges to seal completely. No steam should escape. The foil creates an oven environment inside the pan.
Increase the smoker temperature to 325°F. Return the covered pan to the smoker. Close the lid and cook for 1.5 to 2 hours. Don’t open during this time. The consistent heat and steam break down the collagen.
Check for doneness at the 1.5-hour mark. Remove the foil carefully (watch for hot steam). Insert a thermometer into several cubes. They should read 200°F to 205°F. The meat should be fork-tender. A fork should slide in with almost no resistance. If it’s not quite there, re-cover and cook another 15 to 30 minutes.
Step 4: Shred the Beef
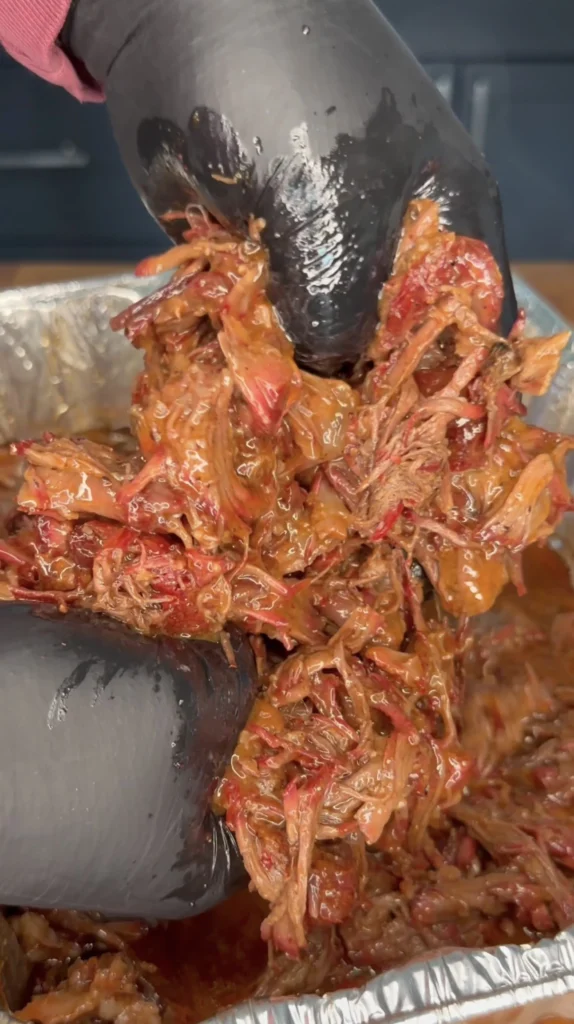
Remove the pan from the smoker when the beef reaches 200°F to 205°F. Let it rest in the pan for 15 minutes. The beef will reabsorb some juices during this rest. It also cools enough to handle safely.
Using two forks, shred the beef directly in the pan. Pull the meat apart into bite-sized shreds. Mix the shredded beef with the braising liquid in the pan. The liquid should be thick, glossy, and reduced. Toss everything together until the beef is evenly coated with sauce.
Taste and adjust seasoning if needed. Add salt, pepper, or extra BBQ sauce. The beef should taste intensely flavorful, sweet, smoky, and slightly tangy from the Dr Pepper.
Step 5: Make the Jalapeño Cream Cheese Spread
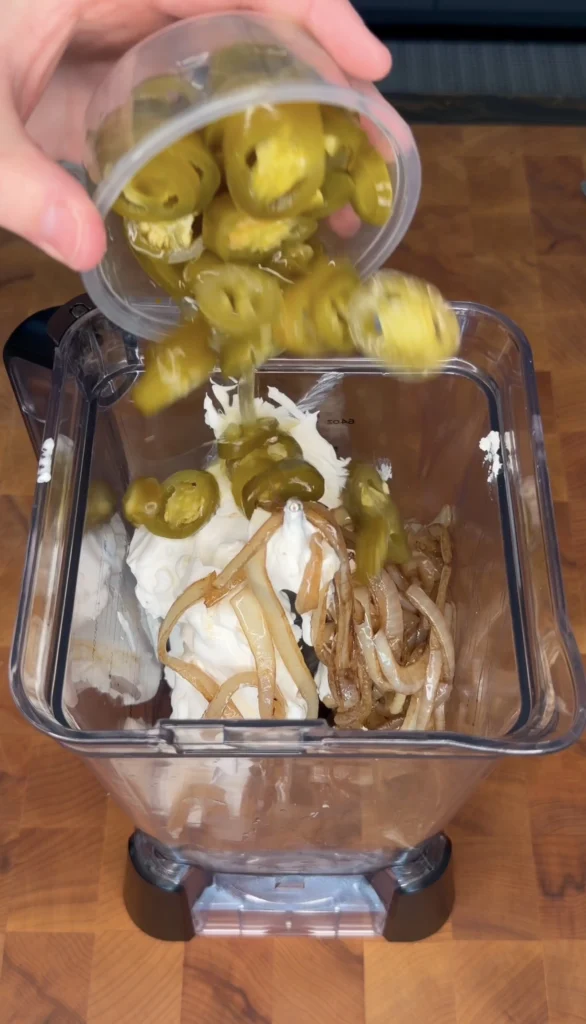
While the beef braises (or ahead of time), make the spread. In a medium bowl, combine 8 ounces softened cream cheese and ½ cup sour cream. Use a fork or hand mixer to blend until smooth and creamy.
Add 2 finely diced jalapeños (seeds removed for mild heat), 1 caramelized medium onion (cooled), 1 teaspoon garlic paste, and salt to taste. Mix everything together until well combined. The jalapeños and onions should be distributed evenly throughout.
Refrigerate the spread for 15 to 20 minutes. This firms up the texture and allows flavors to meld. After chilling, it should be thick enough to spread without running but soft enough to work with easily.
Step 6: Assemble the Sliders
Preheat your oven to 375°F. Cut 12 to 15 slider rolls in half horizontally. For connected slider rolls (like Hawaiian rolls in a tray), slice the entire tray in half horizontally. Keep the bottom halves connected and the top halves connected. This makes assembly easier.
Place the bottom halves of the rolls in a 9×13-inch baking dish or on a large baking sheet. Spread the jalapeño cream cheese mixture evenly across all bottom buns. Use about 1 to 2 tablespoons per slider.
Layer pepper jack cheese on top of the cream cheese. Use about 1 slice per slider, broken to fit if needed. The cheese sits on the cream cheese rather than directly on the bun.
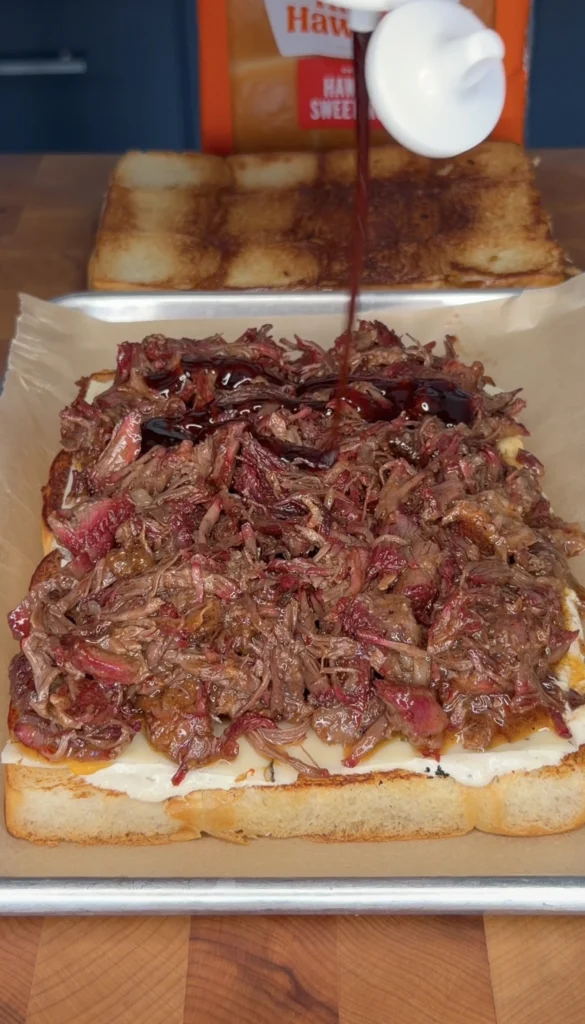
Spoon shredded BBQ beef generously onto each slider. Use about ¼ to ⅓ cup per slider. Make sure each slider gets plenty of beef and sauce. Don’t drain the beef. The sauce keeps everything moist.
Add another layer of pepper jack cheese on top of the beef. This creates cheese on both sides of the beef. As it melts, it glues everything together. Sprinkle crispy fried onions over the cheese and beef. Use as much as you like. They add essential crunch.
Place the top halves of the rolls over the filled sliders. If you want, brush the tops with melted butter or BBQ sauce. This creates golden, flavorful tops.
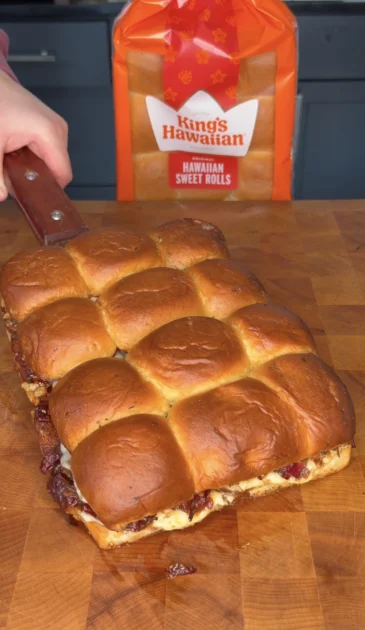
Step 7: Bake Until Golden and Melty
![]()
Cover the pan loosely with aluminum foil. Bake for 15 minutes covered. This gently heats everything and starts melting the cheese without browning the tops too quickly.
Remove the foil. Bake for an additional 5 to 8 minutes uncovered. Watch carefully during this final baking. The tops should turn golden brown. The cheese should be fully melted and bubbly. The crispy onions should darken slightly.
If the tops are browning too fast, tent with foil again. If the cheese isn’t melting after 20 minutes total, increase oven to 400°F for the final few minutes.
Step 8: Serve the Sliders
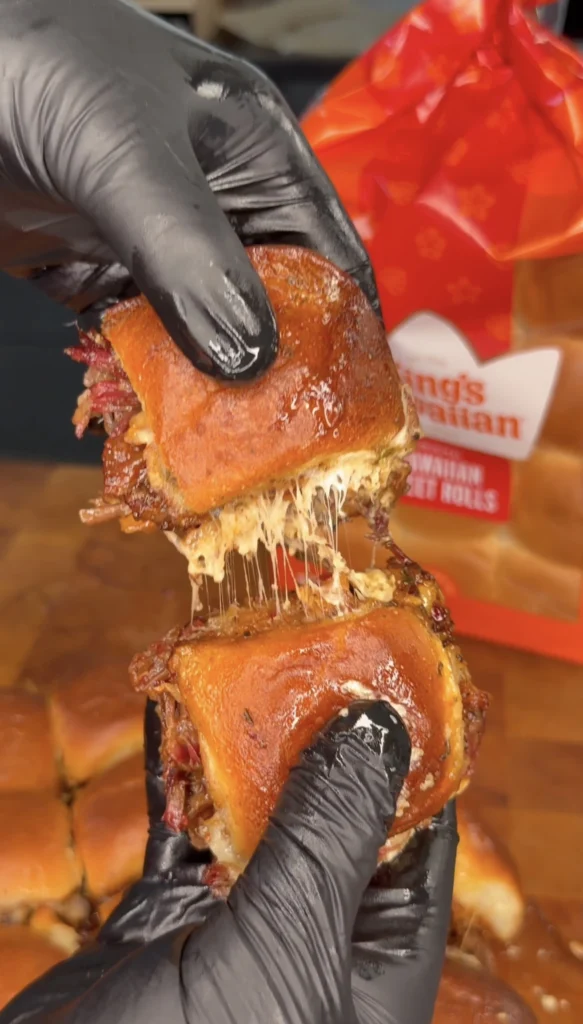
Remove the smoked Dr Pepper BBQ beef sliders from the oven when the cheese is melted and tops are golden. Let them rest in the pan for 3 to 5 minutes. This allows the cheese to set slightly. The sliders are easier to separate and serve after a brief rest.
Use a spatula to separate individual sliders if they’re connected. Transfer to a serving platter or serve directly from the baking dish for casual gatherings. The sliders should hold together well. The jalapeño cream cheese acts as glue.
Serve immediately while hot with extra BBQ sauce on the side. These are best eaten within 20 to 30 minutes of baking for maximum crispiness and melted cheese.