
Some food trends are so effortlessly brilliant that you feel a little slighted for not thinking of them first. After twenty years of using my faithful KitchenAid for buttercream, sourdough, and heavy cakes, I realized I had overlooked its most fun capability. It turns out the ultimate tool for a DIY Dairy Queen experience has been sitting on my counter all along.
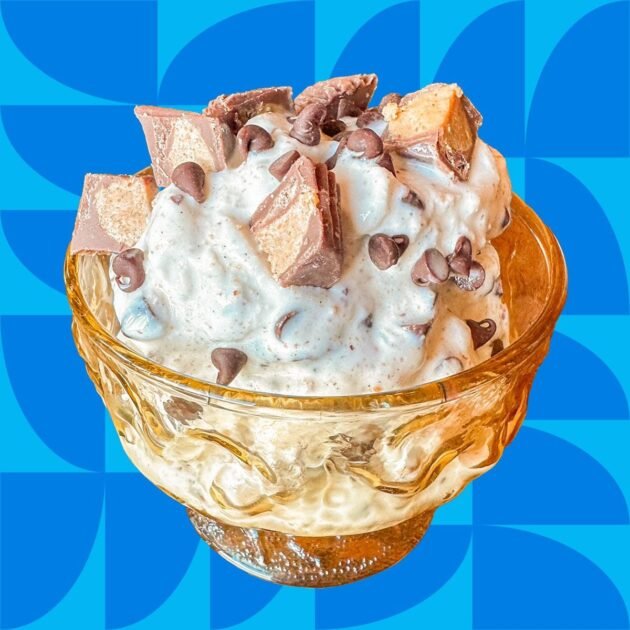
The viral stand mixer Blizzard trend is taking over kitchens for one simple reason: it bridges the gap between a hard scoop of ice cream and a runny milkshake. By using the paddle attachment, you can aerate and soften store-bought pints into a thick, velvety soft-serve consistency that holds onto toppings like a dream.
The Magic of the Paddle Attachment
What makes this special is the texture. When you stir mix-ins into a bowl by hand, the ice cream stays chunky and the toppings often sink to the bottom. The stand mixer mimics the industrial spindles used at dessert shops, folding your ingredients into every nook and cranny.
The result is a customizable masterpiece. Whether you crave crushed chocolate sandwich cookies, salty pretzels, or swirls of peanut butter, the mixer ensures you get a bit of everything in every single spoonful. It is the perfect activity for a rainy afternoon or a “cool mom” win during spring break.
Ingredients
pint (approx. cups) of your favorite high-quality vanilla or chocolate ice cream
cup of mix-ins (chopped peanut butter cups, mini chocolate chips, or crushed cookies)
Optional: A splash of heavy cream for extra silkiness
Optional: Caramel or hot fudge for swirling
Instructions
. Soften the Base
Let your ice cream sit on the counter for about to minutes. You want it to be scoopable but not runny. If you are a perfectionist, you can chill your mixer bowl in the freezer for minutes beforehand, though it is not strictly necessary.
. The First Mix
Scoop the ice cream into the bowl of your stand mixer. Using the flat paddle attachment, turn the mixer to medium speed. Watch closely as the blades break down the scoops into a smooth, thick ribbon of soft-serve. This usually takes only to seconds.
. Fold in the Fun
Turn the mixer to low and pour in your chopped candies or cookies. If you want a marble effect with fudge or caramel, drizzle it in during the last seconds of mixing.
. Serve Immediately
The friction from the mixer will cause the ice cream to melt faster than usual, so grab a spoon and dive in right away. For the true experience, serve it in a tall glass and see if it passes the “flip it upside down” test.
Tips for Success
The beauty of this recipe is the versatility. If you find your ice cream is a bit too firm to move, add a single tablespoon of milk or heavy cream to help the paddle get started. For those who love fruit flavors, try mixing in frozen raspberries or a spoonful of lemon curd for a gourmet twist.
This technique has completely changed how we do dessert night at my house. It is fast, requires almost zero cleanup, and tastes significantly better than a standard bowl of plain vanilla. Once you see that glossy, thick texture swirling in your mixer, you will never go back to the basic scoop again.