
Some of the best cooking lessons do not come from expensive culinary schools or glossy textbooks. Instead, they are whispered over flour-dusted counters and passed down through generations. For many of us, the most brilliant techniques were born out of a time when nothing was wasted and every ingredient was treated with respect.
I spent my childhood watching my grandma navigate her kitchen with a quiet, efficient grace. While she taught me the “one protein, one vegetable, and one starch” rule for every dinner, it was her smaller habits that left the biggest impression. Specifically, I noticed she never threw away a butter wrapper. She would smooth it out, set it aside, and eventually use it to create the most perfectly greased pans I had ever seen.
The Magic of the Wrapper
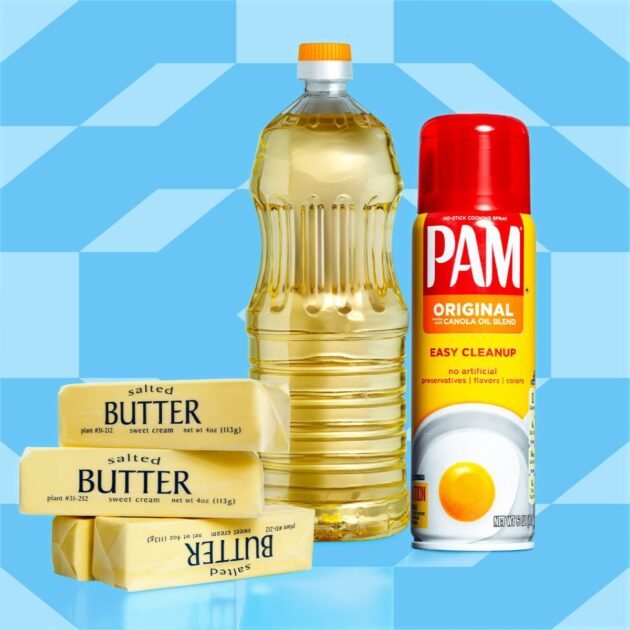
It might seem like a discarded wrapper has nothing left to give, but that thin, translucent paper is actually a baker’s best friend. It holds just the right amount of butter to provide a light, uniform coating on your cookware.
Unlike using a pastry brush, which can be a pain to clean, or using your bare fingers, which is undeniably messy, the wrapper acts as a built-in applicator. The waxed paper provides a sturdy grip while the lingering butter glide across the surface of your tins. It is particularly effective for reaching into the sharp corners of square cake pans or the intricate nooks and crannies of a complex bundt mold.
How to Build Your Wrapper Stash
Implementing this “grandma-approved” hack is incredibly simple and requires zero extra tools. Once you have unwrapped a stick of butter for your toast or a recipe, do not crumple the paper into the bin.
Flatten and Fold: Smooth the paper out to keep the butter residue centered.
The Fridge Method: Store your wrappers in a small resealable plastic bag or a dedicated container in the refrigerator. The cold temperature keeps the butter fresh and prevents the wrappers from becoming a slippery mess in your drawer.
Swipe and Bake: When your recipe calls for a greased pan, grab a cold wrapper from your stash. Swipe it across the bottom and sides of your dish.
Toss: Once the pan is perfectly glossy, you can finally discard the wrapper.
Beyond the Cake Tin
This trick is not just for sweet treats. Use your butter wrappers to prep your casserole dishes before a lasagna or to lightly coat a cookie sheet before roasting vegetables. It is a fantastic way to ensure your savory bakes release perfectly every time.
If you are working with a particularly large pan, you might need two wrappers, but usually, one stick’s worth of leftovers is more than enough for a standard -inch round. It is efficient, cost-effective, and a lovely way to keep a bit of kitchen history alive.
Next time you are baking a batch of cookies or a birthday cake, reach for that saved wrapper. It is a small gesture of kitchen wisdom that makes the process just a little bit smoother and much more nostalgic. Give it a try, and you might find yourself never throwing away a wrapper again.